Wednesday 29 October 2014

Week 4 Materials and Starting X-wing

Week 4 Materials and Starting X-wing


This week we learnt about the different materials Maya offers and how to apply those materials to our 3d Models.I have been looking forward to learning about this since we started because up until now all the models I have made so far have had the basic "Lambert" applied to them by default and as a result look very flat and boring,so I was very eager to learn how to make my models more realistic.


The first Exercise was to create a object and apply a material that would give the impression that that object is a shiny metal. I did this by playing around with the specular option and the specular colour, however i struggled at first trying to get this shiny metal look. I tried a plain metal grey colour using the "Blinn" material but that didn't achieve the look i wanted. 

I then tried with a different material in this case "Phong E" and I tried to use the specular colour and make it so it looked like a shiny copper cube, this looked a bit better but still wasn't shiny enough for me. So I decided to make a little dagger and try to make the blade look shiny. As the cube shape caught the light very harshly and didn't seem to work, im not sure if the shape has makes any difference but i thought i would try none the less.


The Shape of the blade of the dagger i found made it easier to get the right shiny look as it catches the light well i also used the anisotropic material for the blade, and "Phong" for the hilt and pommel. The end result, i think looked really good! 

Procedural Maps and Bump Maps


Next we learnt how to apply further effects to our objects through the the use of Bump maps and procedural Maps, as it turns out Maya has so many different procedural maps that i felt a bit daunted by them but after trying out each one, its quite clear how each of them could be used for different affects. Once i had tried all of the procedural maps i went about using some of them to create an asteroid for my animation. I created a couple of  spheres( with low sub-divisional axis) that i linked together using the combine tool. I then smoothed them and applied this texture to the resulting mesh.
Texture taken from google -http://lazyeels.files.wordpress.com/2013/10/rockred.jpg
I then used a combination of procedural maps on the object to create a textured serface, i used the Noise map and Mountain map overlapped, i also added a glow effect so that the texture popped a bit more, as if it was reflecting sunlight. I was really impressed with the result.


Starting my X-wing

As soon as i knew we were going to be creating star wars models for the assignment, the first idea i had was an X-wing, its such an iconic ship and anyone, even those who are not star wars fans find it instantly recognisable, for this reason i was set of creating one for my first model.

To start with i studied  as many images as i could find of the x-wing so that i could get a feel for its shape. This image i found very useful as it shows the x-wing from many angle. I opted out of importing the images into the view-field like in the 3 view studio method as i found i got on better just having the image on a second monitor next to my Maya window.
The first step i did was to create the wings. to do this i create a simple cube from the polygon menu, i then made a loopcut around the object in the centre by using the multi-cut tool and pressing Ctrl. I then selected to two end faces as used the scale to to shrink them down giving me the following shape.

Turns out the cut i made in the middle wasnt exactly in the centre so the shape was not symmetrical. I edited this by selecting the edge and moving it to the centre.

I then duplicated the object and rotated one of the meshes 45 degrees in the X axis, and the other -45 degrees in the X axis. This gave me a the basic shape of the "X" in the X-wing, only the wings were far to short and angular.
I then joined both wings together using the combine tool and then scaled the resulting mesh until i had a better shape, like the wings of the xwing. I also started on the x wings guns which were constructed out of a cylinder, with one face scaled down and extruded out.


I then added a lot more detail to the wings by selecting the faces around the sides of the wings and adding a horizontal division and then selecting that edge that had been created through that division and pulling it out, this resulted in the wings having a more angled look. I also made some more cuts and shaped the back of the wings around where the engines are going to go, and added the guns to each wing tip. However the resulting mesh had a lot of problems with overlapping geometry, im not entirely sure what had caused this but i did perhaps overcomplicated things with my methods of adding detail to the wings, i did a lot of extruding and selecting edges and using Boolean to join duplicated geometry

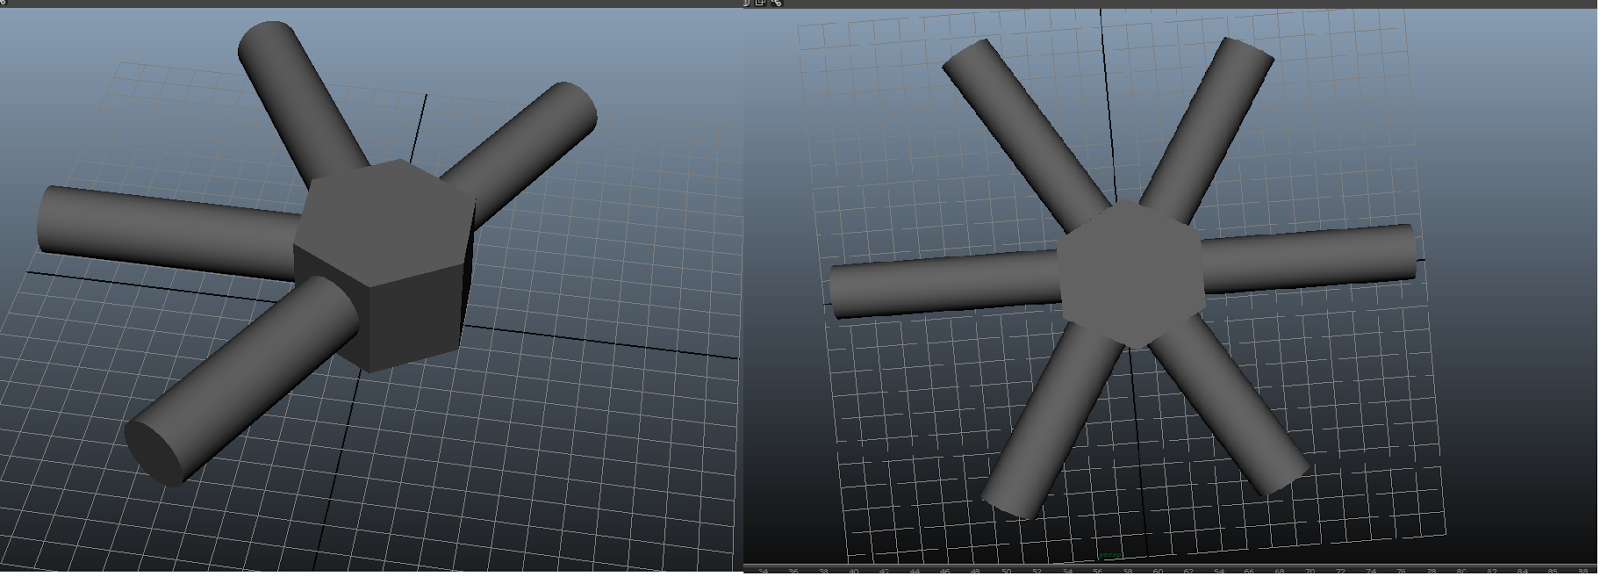
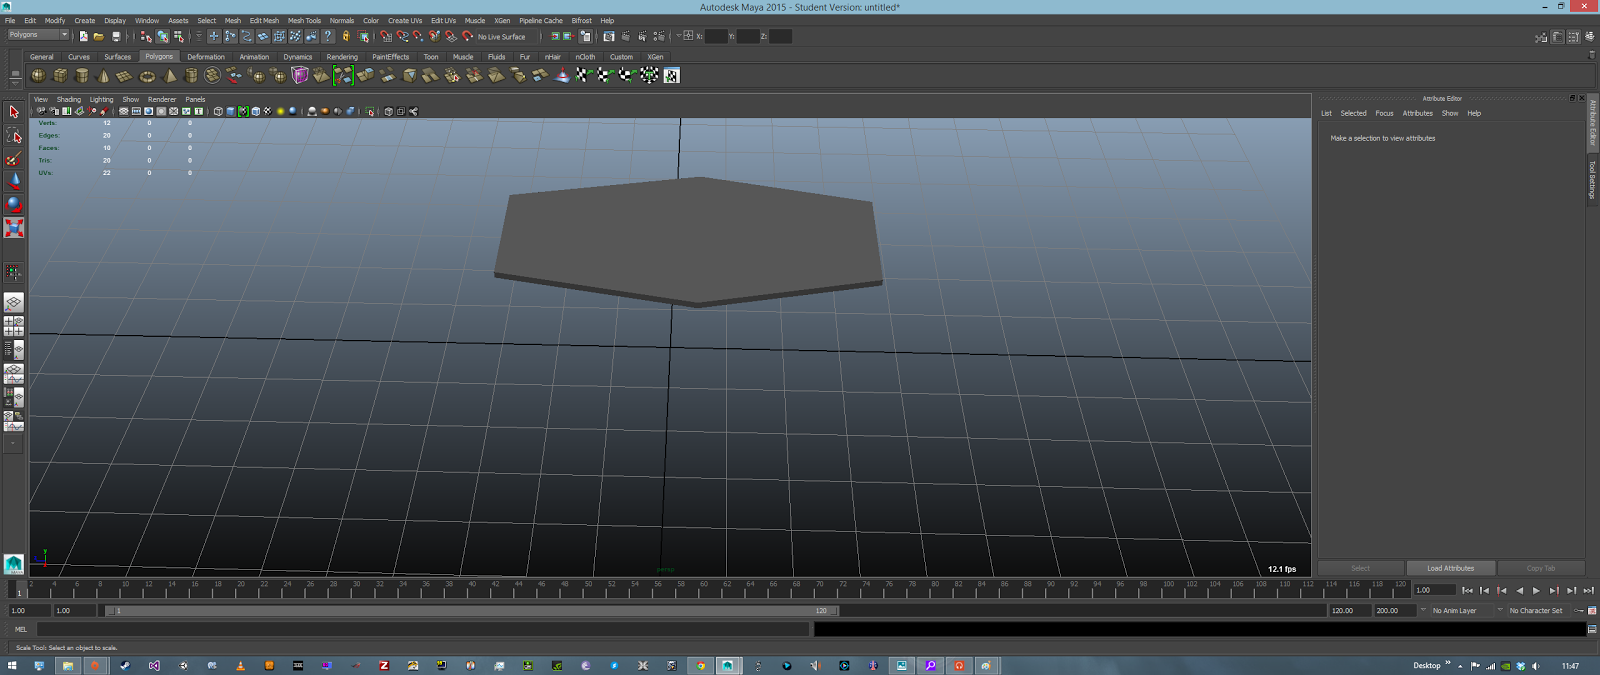
I then created the basic shape for the main body of the X-wing, i created a Cylinder and rotated it 90 degrees, i then lowered its sub-divisional axis so it was more hexagonal then used the Multi-cut tool to create some edges around where the cockpit would start, and then selected one of the end faces and scaled it down so that the shape looked more like that of the X-wings front. I also added the engines as just plain cylinders turned 90 degrees. The shape of the X wing is already beginning to some through.

Wednesday 22 October 2014

Week 3 Revolve Technique and Curves


Week 3  Revolve Technique and Curves


Using Curves to create 3d shapes - exercise one the mailbox....Failure :(

This week we learnt how to outline the shape of an object with the Curve tools and then apply modifiers to transform the 2D shape to a 3D object. During the lab sessions i was able to use the Bezier Curve tool to outline the shape of a mailbox and then fill in that shape to create a plane, of which i could extrude into the shape of a mail box. Unfortunately i was unable to save my work. Bring it home it home due to a problem with the machine i was using. Not to worry i though, i would just simply repeat the task at home. This however proved very difficult. i followed the exact same instructions and as far as i could tell matched the processes i carried out at home to turn the  curve into a polygonal planar were exactly the same. I was unable however to finish this exercise but none the less feel that i understood the methods involved in using curves to create 3d  objects.

Thoughts

I  can see how using curves to create 3d objects would be very useful, it would make it fairly easy to transform 2d sketches into 3d objects. I however didn't really enjoy this exercise very much i haven't used Photoshop much in the past and therefore found using the Bezier curve tool quite annoying and frustrating it took me a long time to draw out a simple shape. I can see myself using it in the future though i just need some more practise.


 Exercise 2 & 3 Revolve technique

The Next exercise was to use the Bezier curve tool again to sketch out half  a wine glass and then use the revolve tool to rotate that cure round 360 degree's through the  Y axis. I quite enjoyed doing this exercise is was quite fun to see a quite simple 2d shape become  cool 3d object, that would have otherwise been quite difficult to model using the other techniques i have learnt so far.


The finished result, looked quite good in y opinion however some of the normals towards the bottom were reversed, i don't know why this happened . however for the second exercise that we  used the revolve tool, in which we drew around an image of a chess pawn that had been inserted into the view field, I was able to successfully use the revolve tool to create a really nice looking 3d model of that chess piece.

3-view virtual studio environment


By inserting a set of three images into the three respective view windows i was able to create a "blueprint" for the model i was going to create in the case if this exercise it was  an aeroplane.
Once the images were  in each view window and aligned correctly, the perspective view pretty much creates the shape of the model for you. You now just need to model and scale polygons to fit within these "blueprints".


To do this i used the x-ray function that turns the polygon's transparent, so that i can see the underlying Image and scale the various polygons to match that image.


what i found useful about this is that by extruding the polygon to fit within the image you end up with a model that is just one mesh, where as previously i have created models buy using the make live tool and inserting polygons on top of polygons this was entirely one mesh, and started out as a cylinder. I do not know if this is beneficial in anyway i just like how, for me at least the model was not as complex as previous ones i had created that had been constructed out of loads of different shapes put together.

The finished result, a somewhat messy aeroplane. Although i really enjoyed this exercise  and can see how using the 3 view studio layout can be really useful i think i would get better on just simply having the images on a second monitor next to my work environment, and i think when i come to create my star wars models i wont use the 3d studio environment. 

Thursday 16 October 2014

StoryBoard

Storyboard

This is just a draft for my storyboard and is what i would like to achieve in my animation, however i may find run into problems in the development process. For this reason the final animation may be different to this storyboard.


Monday 13 October 2014

Week 2 Exercises and FPS Building/Ruin Task


This week we covered more modelling techniques, including how to refine and add extra geometry into your models and also how to use Boolean operations to cut out or join together complex shapes. We also learnt how to you the align tool and touched upon using curves.

Boolean Operations

Union
 i found using the Boolean operation union very simple, it was easy to join two meshes together and I can see how it will be a useful tool when it come to creating more complex models.  The ability to move and scale the joined meshes as one is a useful asset. However I made a mistake and wanted to un-join two meshes after I had used the union operation. I was unable to use undo to get back as I had taken too many steps and as a result was unable to find a way to reverse the operation. I can see this causing some problems so will use this Boolean operation sparingly.


Difference
I really liked using the Difference Boolean. The operation is simple and easy to implement and you can get some really good shapes and effects that would otherwise be quite tedious and time consuming to create. 


Intersection
Just like the Difference Boolean, I really enjoyed using this tool. It enable you to create quite complex shapes easily and quickly. 

Alignment Tool 

I found the alignment tool quite tricky to use, When the two objects are selected that i want to align. The on screen alignment icons are quite difficult to interpret and as a result I found I was just randomly clicking around to try to get the object to align. Eventually trough trial and error i was able to Align the object as the  exercise required. I can see how the alignment tool is very useful in creating precise and symmetrically accurate models.I will have to play around with it more so i can figure it out.


Ruined house for FPS game

We were tasked at creating a Ruined building that could be used in a First person shooter. 
first i designed the basic layout for the building i was going to create. It would have two floors and several small rooms inside as well as a stair case joining the two floors. I sketched out the basic layout and design for the building.

  • From this sketch I was able to begin creating the model  The first step way to create the ground floor. I did this by creating a Cuboid shape as the floor and the adding divisions to its top face,so that i had a grid pattern. I then extruded the required faces to create the downstairs layout, as shown below.


  • Then  I created a cube and used the Boolean operation, difference cut the windows into the building. This was relatively easy but at first i was having trouble with this. The Windows were being cut out but there were hole in the geometry where the windows were. I first used the bridge tool to fill in the gaps but then discovered that I could edit the way the Boolean operation is done by clicking the little square next to difference in the toolbar. This enabled me to set it so the difference Boolean creates the geometry where it cuts away and doesn't leave holes.


  • I then created the stairs by using the extrude tool again.

  • Once the ground floor was done i duplicated the first floor and scaled it up slightly so that the top floor was slightly bigger than the bottom. I then cut away the floor around where the stair case is  and covered the holes using the bridge tool, then placed the second floor on top of the first. 


  •  I then created another cuboid and added that on top of the second floor. i then split the top face of that into divisions using the multi-cut tool. I then selected and pulled edges from that face to make the roof in the same way i created the roof on my house that i made in the previous task.
  • To create the destroyed look I used several different shapes and the difference Boolean tool to cut out areas of the building giving the building a damaged/ruined look


  • Once this was done all that was left was to add some extra things like walls, debris and a half demolished statue. And the end result.


Thoughts on Exercise


Overall I really enjoyed this exercise. I didn't find it too difficult and was able to use the techniques I learnt this week to get, in my opinion, some really good results. As im doing the games design course I found the task really beneficial and can see myself using this method to create buildings in the video games i develop in the future.

Friday 10 October 2014

Thoughts About The Assignment And Moodboard

1)

What we have to do 

For the first assignment we have been asked to design and create three models from within the star wars universe.

Thoughts

Image result for starwarsWhen I first learned that it was a requirement that the models we had to make for the Assignment, needed to be from the star-wars universe I was thrilled. Being an avid Science fiction fan, the prospect of being able to design models from one of the greatest Science fiction franchises ever, was to me, fantastic. Straight away I had ideas for the models I wanted to create. I thought that spacecraft would be be a great place to start, as the star-wars universe is so rich and diverse in its different spacecraft, and vehicles.

2)

What we have to do 

For the second assignment we need to create a 30 second animation using the models we created in the first assignment.

Thoughts

When we were shown examples of last years animation assignments. I was quite bewildered . They were all of a high standard and I felt a bit  daunted when I  thought that I need to create something as good as this before Christmas. However I am looking forward to learning about animation. I struggled, last year creating camera animations within "Unity" so, I am a little apprehensive about the animation assignment.

Planning Models

We were tasked to create a mood board , to help us get ideas and decide what models we wanted to create.  Below is the first Mood board I created. Initially wanted to use the battle on "Hoth" from Star-Wars, as the basis of my animation and include the AT-AT(walkers) as one of my models. I was instructed however, not to create an AT-AT as a model as it would apparently prove too difficult in the rigging and animation processes. As an AT-AT is technically quadruped, and those are notoriously difficult to animate.

So I went back to the drawing board and decided on three space craft. I wanted to create an "X-wing" and a "Tie fighter" as my models and have my animation involve a chase between both spacecraft. I also decided that "Slave I" the character "Boba Fett's" ship would be a good choice as the "X-wing" and "Tie fighter" are both quite geometrical and angular. "slave I on the other hand is curved and I thought this would help me in learning how two model different shapes and surfaces in the future.


Monday 6 October 2014

First impressions of Maya 3D Modelling software


First impressions of Maya 3D Modelling software 

When i first opened  Maya and was presented with the UI, I  was quite bewildered by its intricacy.
The user interface is very complex and thorough and although familiar with working in virtual  3D environments ,through working in game engines like "Unity", I was none the less quite intimidated. After a little fiddling around I was able to create simple 3D objects and move them around within the  environment. Again it felt quite familiar as the the way Maya does this is quite similar to "Unity".

Exercise one -  Steering Wheel 

The first exercise was to create a ship steering wheel, Although in hindsight the task was relatively easy I found it difficult to follow the activity, and found myself accidentally clicking on or selecting unintended functions . Once I was able to get a grasp of the different keyboard shortcuts my work flow improved and I managed to complete the task.

How I made the steering wheel                                                          

1) First i created a cylinder  and changed its "Subdivision Axis"to 5 this created the center piece.        


2) Then i added a cylinder that extrudes outwards to each of the 5 faces. This is how i made the struts of the wheel.


3) Finally i created a torus shape at the center and scaled it up so that it would link all the struts together. i also added some more shaped to improve the overall look at aesthetic.

Thoughts on exercise.

Overall I enjoyed this exercise. Initially I found quite difficult to navigate the UI , however after a while I found it got easier. I found it quite similar to creating object within the unity game engine and was quite pleased with the end result. Trying to make sure all the struts were the same length was quite difficult however. 

Exercise Two - Low poly house

The second exercise was to follow a tutorial and create a low poly house. This exercise I found a lot more tricky than the first. In this tutorial I learnt some new techniques. I learnt how to select and extrude faces on objects to "Block out" my model. I also learnt how to joining verities and creating  divisions on faces as-well.

Things I found hard
  • The bevel process- I found it quite difficult when creating the lip that runs around the house below the roof. I was unable to match the settings in the tutorial exactly and as a result my end result doesn't look precisely like the tutorial.
  • Linking edges to form roof - It took me several attempts to match the roof layout shown in the tutorial and I was unable to get the vertices joined on my first go and only after many try's did figure it out.
The end result